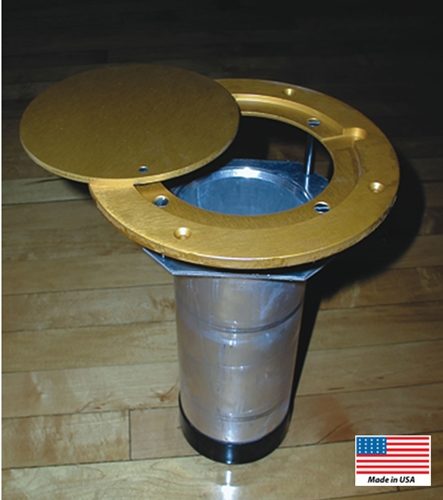
INSTALLATION INSTRUCTIONS
6082 FLOOR SLEEVE
FOR EXISTING SYNTHETIC FLOORS
- Lay out floor sleeves across court suitable for type of court
you desire. NOTE: Minimum spacing for poles to comply
with rules is 36’6” center to center of poles per court. - Lay out an 8” diameter off of centerlines. (Top plate may
be used as a template) Note: Hinge point of cap should be
outside of court. - Cut away synthetic material then cut a hole large enough
to allow sleeve to be inserted down until top of plate is
flush with playing surface. This may be done with either
a core bit or by drilling a series of smaller holes and knock-
ing out the voids. Note: If the depth from the top of the floor
to the concrete slab is greater than 12 ½”, stop at the 12 ½”
depth. If the distance is less the 12”, it will be necessary to
break through the concrete slab. - Should it be necessary to break through the concrete, a hole
approximately 30” in diameter will have to be scraped out
underneath the slab. The depth of this hole should be no less
than 16” from the top of the floor. - Chisel out the concrete to accommodate the floor sleeve top
plate (minimum 5/16”). Then insert floor sleeve assembly
into the hole and check to make sure top plate sits properly in
the hole. Mark 4 hole locations, then drill suitable holes for
lead anchors. - The drilled hole (and the cavity scraped out under the concrete
if it was necessary to break through) will no have to be filled
with non-shrink grout. (Manufacturers: Por-Rok, Embeco,
Hydrocide, Masterbuilders Masterflow #713). Refer to the
manufacturer’s instructions for proper use. - Pour the grout mixture into the hole until the level of the grout
is approximately 7” below the top of the floor. Insert the floor
sleeve assembly into the grout and push down until the top plate
rests squarely in the chiseled area. Before fastening the floor
sleeve into position, open the lid to check the level of the grout.
It should be at least flush with the square plate. Do Not allow
grout to enter sleeve. The top of the sleeve must be blocked off
or plugged to prevent grout from entering sleeve. - Fasten the floor sleeve into the lead anchors with the 4 wood
screws provided. (Optional)
IMPORTANT: It is essential to allow the grout to fully cure before
using this system. Normal curing time is between 7 and 10 days, but
always follow manufacturer’s directions completely. Failure to allow
the floor sleeves to set may result in poor system performance and may
damage the floor of your facility.
SKU:6082II
